The oven cleaning process is a step-by-step routine that prepares, cleans, and restores your oven to maintain hygiene, performance, and safety. It covers everything from removing wire racks and wiping loose debris to choosing between methods like self-cleaning cycles, steam cleaning, or a baking soda paste. In Australia, where ovens take a beating from roasts, bakes, and weeknight spills, regular cleaning prevents thick grime buildup and the unpleasant smells that follow. Whether you are a homeowner or a renter preparing for an end-of-lease inspection, understanding the full process means you get results without damaging your appliance.
What are the essential steps in the oven cleaning process?
The standard oven cleaning process follows a clear sequence: prepare, clean, and finish. Skipping any stage reduces effectiveness and can cause damage or lingering odours. Here is how to work through it properly.
-
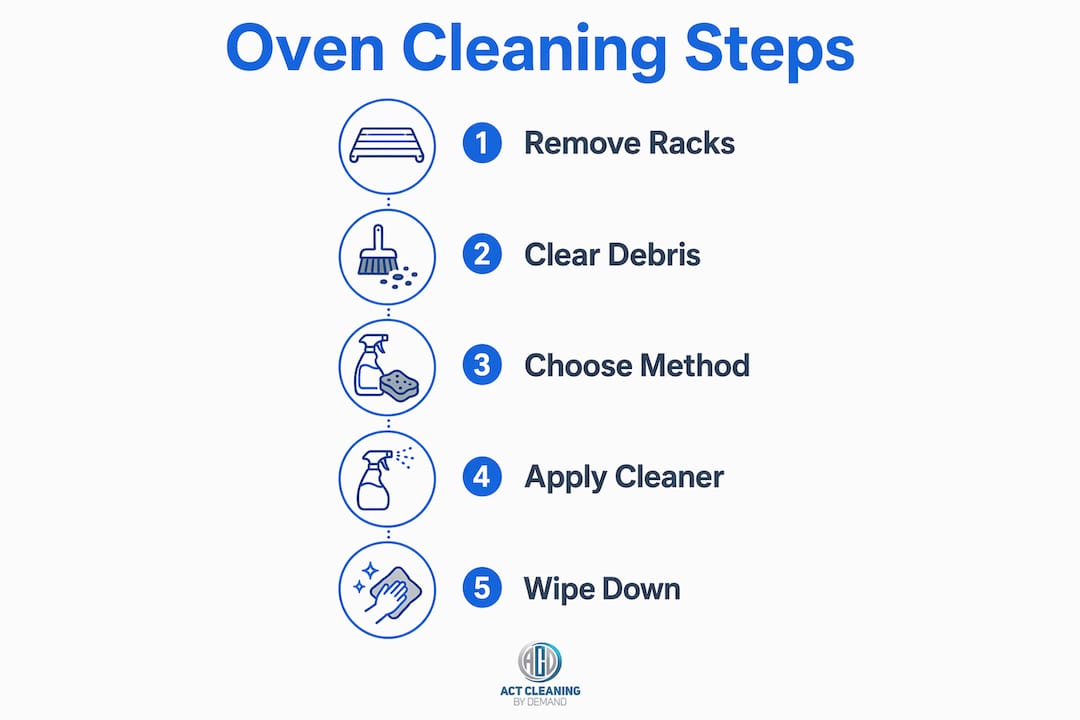
Remove the wire racks. Pull out all racks before you do anything else. Self-clean cycles reach temperatures around 480°C, which can warp or discolour racks not designed for that level of heat. Soak racks separately in hot soapy water while the oven cleans.
-
Clear loose debris. Use a dry cloth or soft brush to wipe out crumbs and loose food particles from the oven floor and walls. Removing loose debris before a deep clean reduces smoke during high-heat cycles and improves how well your chosen cleaner penetrates baked-on grime.
-
Choose your cleaning method. Match the method to your oven type and the level of grime. Self-cleaning cycles suit heavily soiled ovens with pyrolytic capability. Steam cleaning and baking soda paste work well for standard ovens and lighter buildup. More on each method in the next section.
-
Apply your cleaner and allow dwell time. Whether you are using a commercial spray, a baking soda paste, or a steam dish, give the product time to work. Dwell time is crucial for breaking down grease bonds before you wipe. Rushing this step is the single biggest reason people end up scrubbing harder than necessary.
-
Wipe and rinse thoroughly. Use a damp microfibre cloth to remove all residue. A final wipe with vinegar solution (50/50 with warm water) cuts through any remaining greasy film and prevents odours when the oven heats up next time.
-
Reassemble and test. Return the clean racks, close the door, and run the oven at a low temperature for five minutes to burn off any remaining moisture or faint cleaner smell.
Pro Tip: Line the oven floor with a non-stick oven liner before reassembling. It catches future drips and makes your next clean far quicker.
How do the main oven cleaning methods compare?
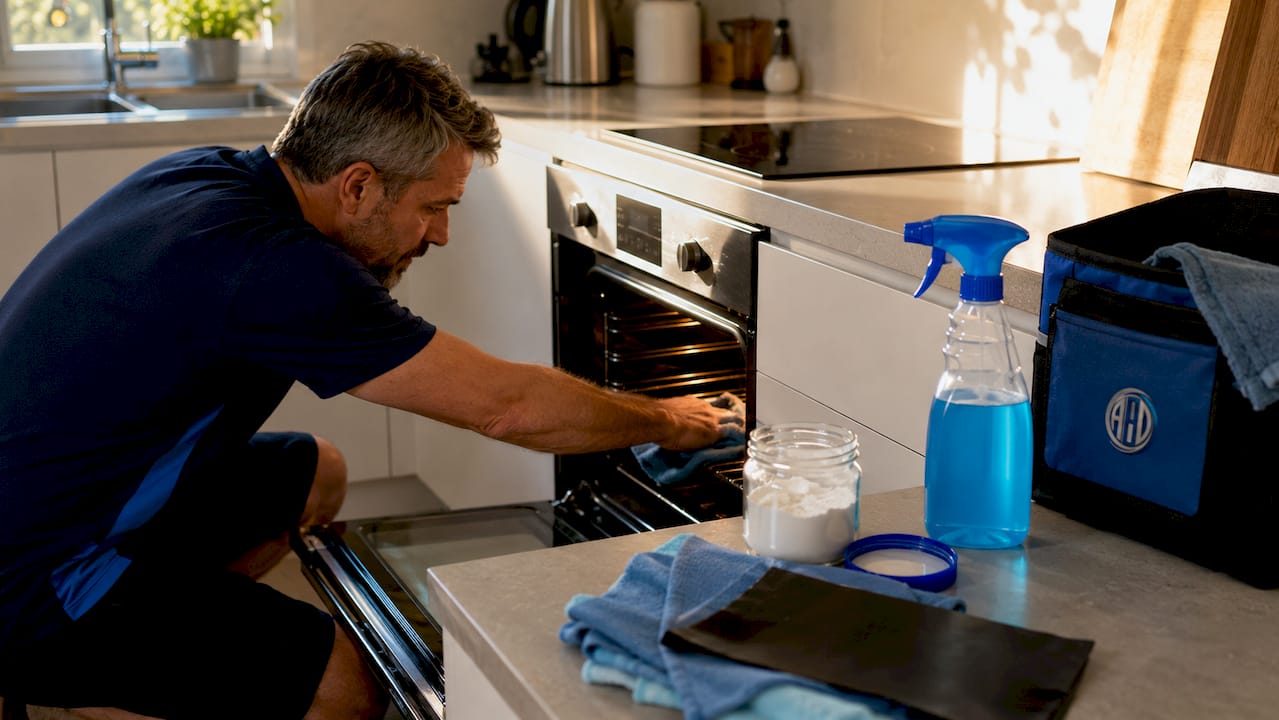
Three methods dominate the cleaning an oven guide conversation: self-cleaning cycles, steam cleaning, and the baking soda and vinegar approach. Each suits different situations.
Self-cleaning (pyrolytic) cycle
Pyrolytic ovens burn residue to ash at extreme temperatures. You lock the door, select the cycle, and the oven does the work over two to four hours. The result is a fine ash you wipe away with a damp cloth. The trade-off is heat, smell, and energy use. Always ventilate the kitchen well during the cycle, and keep pets out of the room since fumes can affect birds in particular.
Steam cleaning
Steam cleaning loosens grime using water and heat, with no harsh chemicals involved. Preheat your oven to about 230°C, place an oven-safe dish filled with water and a splash of white vinegar on the lower rack, and let it run for 20 to 30 minutes. For heavily greased ovens, extend the time to 60 minutes and keep the door closed during cooling so the steam keeps working. Eco-friendly steam cleaning is gaining popularity in Australian homes because it produces no harsh fumes and uses ingredients already in your pantry.
Pro Tip: Do not open the oven door immediately after steam cleaning. Keeping the door closed after the cycle allows moisture to circulate and soften residue further, making the wipe-down much easier.
Baking soda and vinegar method
Mix one cup of baking soda with two tablespoons of water to form a spreadable paste. Apply it across the oven interior, avoiding heating elements and the door seal. Leave it for several hours or overnight. The baking soda paste draws out grease and lifts baked-on food without scratching surfaces. Spray white vinegar over the dried paste to activate a gentle fizzing reaction, then wipe everything clean with a damp cloth. This method suits renters who want to avoid strong chemical smells and works well for removing grease without harsh chemicals.
| Method | Time required | Best for | Chemical use |
|---|---|---|---|
| Self-clean cycle | 2 to 4 hours | Heavy buildup, pyrolytic ovens | None |
| Steam cleaning | 30 to 60 minutes | Moderate grime, standard ovens | None |
| Baking soda paste | Several hours to overnight | Stubborn spots, chemical-free preference | None |
| Commercial spray cleaner | 15 to 30 minutes | Quick cleans, moderate grime | Yes |
Eco-friendly cream cleaners and bicarbonate of soda are effective alternatives to commercial sprays. Apply a cream cleaner for 15 to 30 minutes, cover door seals and glass as directed, then rinse and scrub gently. For an eco-friendly kitchen approach, these natural methods deliver results without the fumes or environmental impact of solvent-based products.
What mistakes should you avoid when cleaning your oven?
Even experienced home cooks make these errors. Avoiding them protects your appliance and gets you a better result.
-
Leaving racks in during a self-clean cycle. Oven racks are heat-resistant to normal cooking temperatures, but pyrolytic cycles operate far beyond that range. Leaving racks in risks warping them permanently and can affect the rack glides inside the oven cavity.
-
Opening the door too early after steam cleaning. The steam needs time to penetrate and soften residue. Opening the door within the first few minutes releases the moisture before it has done its job, leaving you with grime that is only partially loosened.
-
Mixing incompatible cleaners. Never combine bleach-based products with vinegar or ammonia-based sprays. The chemical reaction produces fumes that are harmful in an enclosed kitchen space. Stick to one product per clean and rinse thoroughly before switching.
-
Skipping the final wipe. Residue left inside the oven after cleaning will smoke and smell the next time you cook. A quick wipe with a damp cloth and a vinegar rinse takes two minutes and makes a noticeable difference.
-
Attempting to disassemble the oven door glass. Many homeowners try to clean between the glass panels of the oven door by taking it apart. Disassembling door glass risks damage and can void your warranty. Clean only the accessible inner and outer surfaces with a degreaser and a microfibre cloth, and leave any between-glass cleaning to an authorised technician.
Pro Tip: Read your oven's manufacturer manual before choosing a cleaning method. Some brands specifically advise against certain commercial cleaners that can damage interior coatings.
How can you keep your oven cleaner between deep cleans?
Maintenance is far less effort than a full deep clean. A few consistent habits reduce grime buildup and extend the time between intensive sessions.
-
Wipe spills as soon as the oven cools. Fresh spills lift off with a damp cloth in seconds. The same spill baked on through three more cooking sessions requires paste, dwell time, and scrubbing. Deep cleaning every few months and wiping spills monthly keeps residue manageable.
-
Cover dishes during cooking. A lid or a sheet of foil over a roasting dish prevents fat and sauce from splattering onto the oven walls and roof. This single habit reduces cleaning frequency more than any other tip.
-
Use a baking tray on the lower rack. Place a tray beneath dishes that are likely to bubble over, such as fruit crumbles or lasagne. The tray catches drips before they hit the oven floor and is far easier to wash than the oven itself.
-
Do a light clean every two to three weeks. A quick spray of diluted white vinegar and a wipe with a microfibre cloth keeps grease from building into a thick layer. This takes under five minutes and makes your next deep clean significantly easier.
-
Check the door seal regularly. A worn or damaged door seal lets heat escape and causes uneven cooking, which often leads to more spills and splatter. Wipe the seal gently with a damp cloth and inspect it for cracks or gaps every month. For tips on cleaning oven racks and glass panels, a consistent routine makes a real difference.
Key takeaways
Effective oven cleaning requires preparation, the right method for your oven type, and a thorough finishing wipe to prevent residue and odours.
| Point | Details |
|---|---|
| Remove racks first | Always pull racks out before self-cleaning cycles to prevent warping from extreme heat. |
| Match method to grime level | Use steam or baking soda paste for light to moderate buildup; pyrolytic cycles for heavy residue. |
| Dwell time matters | Allow cleaners to sit for the recommended time so grease bonds break down before wiping. |
| Final vinegar wipe | A 50/50 vinegar and water wipe after cleaning removes residue and prevents cooking odours. |
| Prevent with maintenance | Wiping spills promptly and covering dishes reduces the frequency of deep cleans significantly. |
Why I think most people overcomplicate oven cleaning
Most homeowners either avoid cleaning their oven for months or go straight to the harshest chemical spray they can find. Both approaches create problems. Avoidance leads to thick, carbonised buildup that genuinely requires professional help to shift. Aggressive chemicals leave fumes, damage coatings, and still require the same scrubbing effort if you have not allowed proper dwell time.
My honest experience is that the baking soda paste method, used consistently every six to eight weeks, outperforms commercial sprays for most Australian households. It costs almost nothing, produces no fumes, and is safe around children and pets. The key is patience. People apply the paste and wipe it off after 20 minutes, then wonder why it did not work. Leave it overnight. That is when it actually breaks down the grease.
The self-cleaning cycle is genuinely useful for ovens that have been neglected for a long time, but I would not use it as a regular maintenance tool. The energy cost is high, the smell is unpleasant, and running the oven at extreme temperatures repeatedly adds wear. Use it once to reset a badly soiled oven, then switch to a gentler routine. And always check your manufacturer's guide before you start. Some oven interiors have coatings that certain cleaners will strip permanently.
— Deng
When a professional clean makes more sense

Sometimes the grime is beyond what a DIY session can reasonably tackle, or you simply do not have the time to do it properly. ACT Cleaning by Demand offers professional oven cleaning services across Australia, using eco-friendly products and techniques that restore appliances without damaging surfaces or coatings. For renters approaching the end of a tenancy, their end-of-lease cleaning packages cover the oven as part of a full property clean, which is exactly what property managers inspect. Booking is straightforward through their website, and packages are tailored to your specific needs rather than a one-size-fits-all approach.
FAQ
What is the oven cleaning process in simple terms?
The oven cleaning process involves removing racks, clearing loose debris, applying a cleaning method such as steam, baking soda paste, or a self-clean cycle, then wiping away all residue with a damp cloth and a vinegar rinse.
How often should you deep clean your oven?
A deep clean every two to three months is recommended for regular household use, with light wipe-downs after spills to keep buildup manageable between sessions.
Is steam cleaning or baking soda better for a standard oven?
Both methods work well without harsh chemicals. Steam cleaning is faster at 20 to 60 minutes, while a baking soda paste requires several hours of dwell time but is more effective on stubborn, baked-on grease.
Can you leave racks in during a self-cleaning cycle?
No. The self-cleaning cycle reaches temperatures that can warp or discolour standard oven racks. Remove them before starting the cycle and clean them separately in hot soapy water.
What are professional oven cleaning services?
Professional oven cleaning services involve trained technicians using commercial-grade, eco-friendly products to deep clean all oven components, including racks, glass, and interior walls, typically in one to two hours without risk of appliance damage.